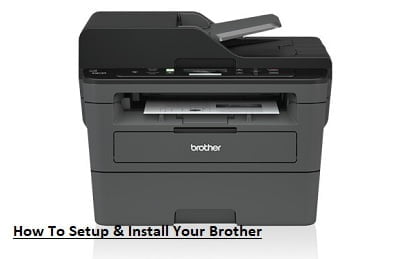
How To Setup & Install Your Brother DCP-L2550DW Printer Full-Brother DCP-L2550DW Is a printer that can print, copy and scan wirelessly. All you have to do is set up Wi-Fi and you can use the printer anywhere in your home or office without annoying wires or cables. Setting up a wireless Wi-Fi connection is easy. Before starting, make sure you have a wireless connection.
Installing the Brother printer using Device Manager
- First, press “Windows R” to open the Run window.
- Next, type devmgmt.msc in the search field and open the device manager by pressing enter.
- Find and expand the Printers or Printers dialog box, then right-click
- Next, Update Driver Software.
- Next, click “Search for automatically updated driver software”.
- Additionally, Windows Manager automatically detects and updates printers. Just follow the on-screen instructions.
How To Setup Connect your Brother DCP-L2550DW with Wifi Setup
Follow your modem router and identify the Network Name (SSID) and Network Key (Password). If applicable, you are ready to set up a wireless Wi-Fi connection for your Brother DCP-L2550DW printer.
- Make sure your Brother DCP-L2550DW printer is turned on.
- Next, Press the menu button.
- Next, Use the down arrow button on the printer control panel to select “Network” and press the OK button.
- Next, Select “WLAN” using the down arrow button on the printer control panel and press the OK button.
- Next, Select “Installation Wizard” using the down arrow button on the printer control panel and press the OK button.
- Next, The message “WLAN enabled?” appears Press the down arrow to select On.
- Next, Your printer will now search for and display a list of available SSIDs (network names) that you can use. Use arrow buttons to select SSID/Network Name and press OK button.
- Next, If your SSID is encrypted with a network key/password, enter it now and hit OK. If your network is not encrypted, continue to the next step.
- Next, When “Use settings?” press the up arrow key to select Yes.
- Next, Your device is now connected to your wireless network.
Brother DCP-L2550DW Driver Download Windows, MacOS, Linux And Mobille Full Software Free
[ DOWNLOAD ]
How to Manually Install Brother Printer Driver Using USB
- First, go to Control Panel and select Hardware and Sound, then Devices and Printers.
- Next, select advanced printer settings.
- Then select a template name and click Next.
- Next, if the model name you are looking for is not found, do the following.
- Then select “The desired printer is not listed” and then select the option ie.
- Next, add the printer.
- Next, in the Hostname or IP address section, enter the IP address and then the model name.
- Next, search for the printer in the search query and select the driver to use automatically, then Next.
- Next, Then from a drop down menu consisting of Brother and then the Model Name list.
- Next, tap Continue next to it.
- Then, after installation, click Finish to continue.
Installing Brothers Printer Drivers for Windows 10
- First, click the download logo above, find the printer model you want, and click Search. Or you can go to product type and select your model.
- Then click Download and select your operating system. Then tap search.
- Next, now under Drivers
- Next select Printer Driver and Scanner driver and click Accept License Agreement and download
- Next.
- After the file is downloaded, you need to repair the .exe file and follow the on-screen instructions to complete the driver installation.
How To Setup & Install Your Brother DCP-L2550DW Printer
- First click on Devices and Printers.
- Next, find your printer name and model.
- Then click Add Printer.
- Next, if your computer cannot find the printer, click Printer not list.
- Then click Add Local Printer.
- Next, enter the printer’s IP address and click the next option.
- Next, select Brother from the download list.
- Next, select the printer driver, select the printer name, and click Next.
- Then set the printer to default settings so that the printer driver is installed correctly.
- Next, check by printing the page or document.
For more details, please visit [CLICK HERE]

