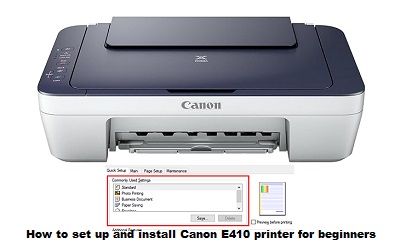
How to set up and install Canon E410 printer for beginners-Printing documents and photos at home has never been easier, thanks to easy-to-use printers like the Canon E410. If you’ve recently purchased this compact and efficient printer, you’re probably eager to get started. In this guide, we’ll take you step-by-step through the process of setting up and installing your Canon E410 printer to ensure a smooth start for beginners.
A Beginner’s Guide to Setting Up and Installing the Canon E410 Printer
Step 1: Unpack and inspect
Start by carefully unpacking and inspecting the contents of your Canon E410 printer. You should find the printer unit, power cord, USB cable (if you are not using wireless setup), installation CD and user manual. Next, Check that all components are present and undamaged for Printer.
Step 2: Place the printer
Choose a suitable location for your printer. Make sure it is near a power source and within range of your Wi-Fi router if you plan to use wireless printing. Avoid placing the printer near direct sunlight, heat sources or dusty environments.
Next, Step 3: Turn on the Canon E410 printer
Connect the power cord to the printer and a power outlet. Press the Power button to turn on the printer. The display should light up, indicating that the printer is ready for setup.
Step 4: Canon E410 Install the ink cartridges
Open the printer cover to access the ink cartridge compartment. The Canon E410 typically uses two ink cartridges: one for black and one for colour. Install the cartridges according to the colour coding and secure them in place. Close the cover once the cartridges are properly installed.
Step 5: Load paper
Adjust the paper guides in the input tray to fit the size of paper you are using, Next Place a stack of plain paper in the tray printer. Make sure the paper is aligned correctly to avoid paper jams.
Step 6: Initial printer setup
Navigate through the printer’s on-screen menu to set your language, region and date/time preferences. Next, Follow the on-screen instructions to complete the initial setup, This step is critical for accurate printing and system updates.
Step 7: Canon E410 Install the software
If your printer came with an installation CD, insert it into your computer and follow the on-screen instructions to install the necessary drivers and software. Alternatively, you can download the latest drivers from the Canon website.
Step 8: Connect to Wi-Fi (optional)
For wireless printing, access the printer’s settings menu to connect to your Wi-Fi network. Follow the prompts to enter your network credentials. If you prefer a wired connection, use the supplied USB cable to connect the printer to your computer.
Step 9: Test print
Print a test page to ensure that the installation was successful. This will also help you identify and troubleshoot any problems.
Congratulations! You have successfully set up and installed your Canon E410 printer. By following these simple steps, even beginners can enjoy the convenience of home printing. Remember to consult your User Guide for additional features and troubleshooting tips. Enjoy printing!
Canon E410 Series Driver Free Download Full


