Epson L121 Printer Setup Guide Quick and Easy Installation full-Setting up the Epson L121 printer involves several steps, including unpacking the printer, connecting it to a computer or mobile device, and installing the necessary drivers, Follow the step-by-step instructions below to set up your Epson L121 printer:
1. Epson L121 Printer Setup Unpacking and Inspection
- Carefully unpack your Epson L121 printer and make sure that you have all the components included in the package, which usually includes the printer itself, ink bottles, power cord, user manual and a driver CD.
2. Preparing the Printer
- Remove all protective tapes, covers and packing materials from the printer. Be sure to remove any orange tape or plastic pieces.
3. Epson L121 Printer Setup Filling the ink tanks
- Open the ink tank cover on the printer.
- Take the supplied ink bottles and open them carefully.
- Insert the nozzle of the ink bottle into the corresponding colour-coded tank (Cyan, Magenta, Yellow, Black) and gently squeeze the bottle until the ink tank is full. Repeat for each colour.
4. Switching on the printer
- Plug the power cord into the printer and then into a wall outlet.
- Next, Press the Power button to turn on the printer, The power light should come on.
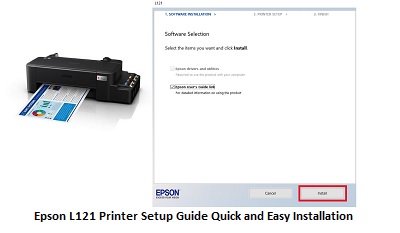
5. Epson L121 PrinterInstalling the printer driver (Windows)
- If your printer did not come with a driver CD, visit the Epson support website to download the latest drivers for your Epson L121 printer.
- Run the downloaded driver file and follow the on-screen instructions to install the printer drivers.
- Next, When prompted, connect the printer to your computer using a USB cable, Make sure the printer is turned on.
6. Installing the printer driver (Mac)
- If you are using a Mac, the necessary drivers may be downloaded and installed automatically. If not, visit the Epson support website to download the Mac driver.
- Open the downloaded driver file and follow the on-screen instructions to install the drivers.
- Next, When prompted, connect the printer to your Mac using a USB cable, The Make sure the printer is turned on.
7. Epson L121 Printer Connecting to mobile devices
- To connect your mobile device (such as a smartphone or tablet) to the Epson L121 printer, make sure your device and the printer are on the same Wi-Fi network.
- Next, Download and install the Epson iPrint app from your device’s app store for Epson L121.
- Next, Open the iPrint app and follow the on-screen instructions to add your Epson L121 printer, App will guide you through the setup process.
8. Epson L121 Printer Print a test page
- Once you’ve successfully installed the drivers and connected the printer, it’s a good idea to print a test page to make sure everything is working correctly. You can do this from your computer or mobile device.
9. Finish Setup
- Once you’ve verified that the printer is working properly, you’ve successfully set up your Epson L121 printer, Next, You can now start using it for your printing needs.
For specific details and troubleshooting tips for your Epson L121 printer model, please refer to the user manual supplied with your printer, as instructions may vary slightly depending on the printer’s firmware and software updates.


